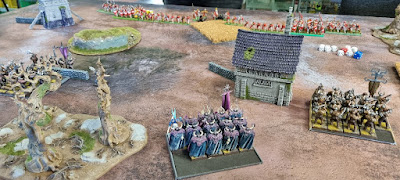
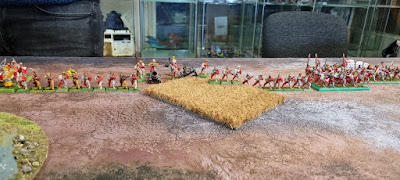
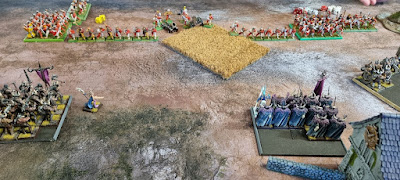
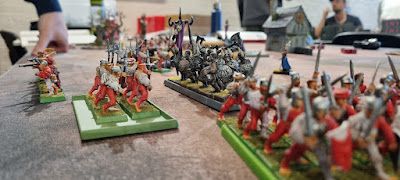
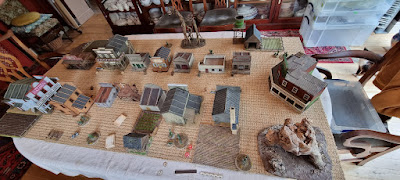
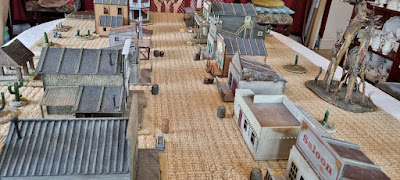
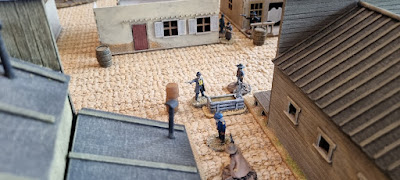
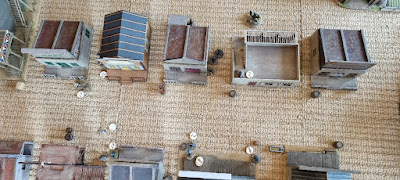
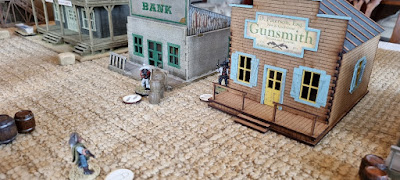
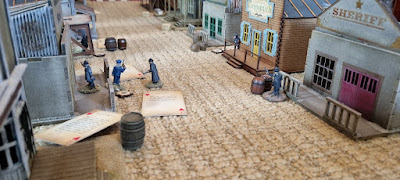
A desolate Empire farmstead somewhere near the Border Princes - a grim testament to humanity's struggle against the encroaching darkness.
The Gathering Storm
The air hung heavy with the scent of damp earth and decay, a stark contrast to the usual arid winds of Khemri. From the desolate human farmstead, its fields long overgrown and its buildings crumbling, the relentless, shuffling advance of the Tomb Kings of Khemri began to manifest. Led by Lord Ramhotep the bone reaver, a venerable Tomb King, his ancient eyes fixed on the horizon, the legions of the undying marched forth, their purpose as clear as the coming dawn: reclaim what was theirs, and utterly destroy any who stood in their path.
But this day, the grim quiet of the farmstead would be shattered. From the nearby, ancient woods, the foul stench of unwashed fur and primal rage filled the air as a Brayherd of Beastmen burst forth, a cacophony of guttural roars and cloven hooves. These twisted abominations, children of Chaos, sought to despoil the sacred lands, unaware of the ancient wrath they were about to unleash. The stage was set for a brutal, grinding conflict between the ordered might of the Tomb Kings and the savage fury of the Beastmen!
1. The Armies Muster
Lord Ramhotep, the bone reaper’s Undying Host: Tomb Kings of Khemri (2000 points)
The Charactors:
Lord Ramhotep, the bone reaper, Tomb King (on foot): The very embodiment of ancient Khemri's might, a tireless warrior whose every swing of his blade carried the weight of millennia. He stood at the heart of the Tomb Guard, a beacon of unyielding resolve.
High Priest: A master of Nehekharan magic, his withered hands crackled with arcane energy, ready to unleash the spells of the Liche Priests upon the foe or to mend the shattered bones of his legions.
Royal Herald with Battle Standard: Bearing the sacred banner of Khemri, his presence bolstered the bindings of the skeletal warriors, ensuring their unwavering advance.
Special:
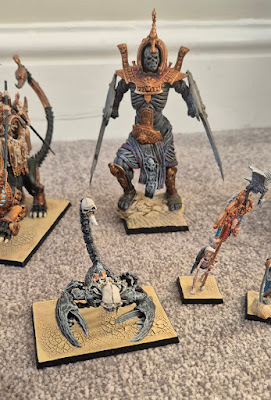
3 Necropolis Knights
Khemrian Warshinx
Tomb Scorpion
Rare:
Tom's Savage Tide: Beastmen Brayherds (2000 points)
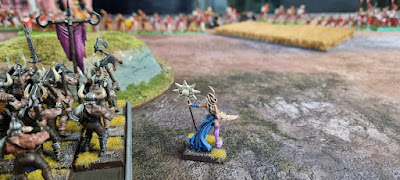
Doombull: A hulking, muscle-bound brute, the undisputed alpha of the Brayherd, his roar a rallying cry, his club hungry for blood.
Great Bray-Shaman (in Chariot): A twisted sorcerer, channeling the raw, untamed magic of the Wild, mounted on a crude chariot, ready to unleash devastating spells or empower his monstrous brethren.
Rare:
2. The Battlefield & Deployment
Scenario: Battleline - A classic confrontation, armies arrayed against each other, with victory hinging on breaking the enemy's will.
The Field of Battle: The battle unfolded across a desolate stretch of the Border Princes, centred around a long-abandoned Empire farmstead. Two crumbling farmhouses, their roofs caved in and windows shattered, stood as grim monuments to a bygone era on either flank. To the north and south, lay two ancient woods providing ample cover, its gnarled trees casting long, ominous shadows. Two prominent hills dominated the landscape; two steep, defensible hills towards the north east and south west edges. Finally, a dilapidated watchtower, its stone weathered and cracked stood in the centre.
Skeleton Warriors and Royal Herald formed the core of the Tomb Kings central line, a solid wall of bone, with Lord Ramhotep, the Tomb King, and High Priest nestled within the Tomb Guard to form an unyielding anvil.
The Necrolith Colossus anchored the centre-left, a towering threat alongside the infantry.
On the left flank, the Skeleton Skirmishers provided a nimble screen, with the Necropolis Knights poised behind them for a swift advance.
The right flank saw the two units of Skeleton Chariots ready to thunder forward, supported by the majestic Khemrian Warshinx.
The Tomb Scorpion remained hidden, burrowed beneath the earth, awaiting the opportune moment to strike.
Tom's centre was a formidable mass, spearheaded by his Tuskgor Chariots, the monstrous Ghorgon, the elite Bestigor Herd led by the formidable Doombull, and the arcane power of the Great Bray-Shaman in Chariot.
On his left flank, Tom positioned his Minotaur Herd, one unit of Gor Herd, a unit of Warhounds, and a single Tuskgor Chariot, ready to smash into My left.
His right flank comprised the remaining unit of Gor Herd, the other unit of Warhounds, and the final Tuskgor Chariot, aiming to outflank My right.
3. The Clash of Eras: Turn by Turn
Turn 1 - The Advance and First Blood:
Beastmen Turn:
The air filled with guttural roars as Tom's Brayherd surged forward. In the Movement Phase, every unit pushed ahead, carefully maintaining distance from my swift cavalry and chariots, seeking to close the gap without exposing themselves to an early charge. The Doombull and Ghorgon lumbered relentlessly towards your centre.
In the Magic Phase, the Great Bray-Shaman in Chariot began to channel the primal energies of the Wild. His focus fell upon my towering Necrolith Colossus, unleashing a searing Viletide that caused 2 wounds to the ancient construct. However, the raw power proved too much for the Shaman to control; a dangerous miscast erupted, causing 1 wound to the Great Bray-Shaman himself and another to a nearby Tuskgor Chariot.
The Beastmen had no shooting phase to speak of, their focus purely on closing the distance.
Tomb Kings Turn:
A chilling silence descended as the undying legions responded. In the Magic Phase, Lord Ramhotep, my Tomb King, began the ancient rites, casting My Will Be Done upon his Tomb Guard, imbuing them with unnatural precision, granting them +1 Weapon Skill. My High Priest then chanted the sacred words of Djaf's Cursed Blades over the same Tomb Guard, ensuring their blows would strike true by granting them re-rolls of 1 in combat. Not content, the High Priest then wove the chilling spell of Deathly Cabal upon the Tomb Guard, granting them a 6+ Ward Save and causing them to emanate pure Terror, a truly terrifying prospect for the Beastmen.
In the Shooting Phase, the combined volleys of Skeleton Chariots and Skeleton Skirmishers targeted Tom's flanking Warhounds. The skeletal archers and chariot crew shot with grim efficiency, felling a couple of beasts in both of Tom's Warhound units, a small but significant opening salvo.
Turn 2 - The Brayherd Unleashed!
Beastmen Turn:
The Beastmen's bloodlust could no longer be contained! In the Charge Phase, Tom's right flank Tuskgor Chariot thundered forward, crashing into the Necropolis Knights – a bold move against the monstrous cavalry! On his left, a unit of Warhounds charged one of my Skeleton Chariots and the mighty Minotaur Herd surged into the Khemrian Warshinx – a truly epic clash of monsters was imminent! In the centre, the colossal Ghorgon roared, slamming into the Necrolith Colossus, the ground shaking from the impact.
However, not all charges went as planned. The Bestigor Herd, despite their ferocity, found their path impeded by the lingering magical vortex conjured by the High Priest, failing to move through it and thus unable to declare a charge. The Warhounds on Tom's left flank, facing your Skeleton Skirmishers, faltered, failing their Fear test and refusing to charge the nimble undead. Adding to Tom's woes, the Doombull, attempting to use his Gaze of the Gods, became affected with Stupidity! He then failed his subsequent Stupidity test, leaving him unable to charge my Skeleton Warriors, a critical failure. The remaining Beastmen units pushed up, poised for a charge in the next turn.
In the Magic Phase, the Great Bray-Shaman in Chariot, despite his miscast wounds, continued to channel dark energies. He unleashed another Viletide into my Tomb Guard, causing 2 more casualties to the elite skeletons. Not content, he followed up with a searing Fireball, felling another Tomb Guard!
The Combat Phase erupted across the battlefield! On your right flank, the Necropolis Knights proved utterly dominant, their serpentine forms and powerful spears annihilating the charging Tuskgor Chariot! With their foe broken, the Knights overran, slamming into the nearby Gor Herd! In the centre, the colossal struggle between the Ghorgon and your Necrolith Colossus reached a brutal climax – the Ghorgon's multi-limbed fury proved too much, and the Colossus was utterly destroyed, crumbling into dust! On your right, the Khemrian Warshinx absorbed 3 grievous wounds from the Minotaur Herd's ferocious assault, but retaliated with a mighty swipe, crushing a single Minotaur. Meanwhile, my Skeleton Chariots on the right flank easily dispatched the Warhounds they were fighting, overrunning into the remaining Tuskgor Chariot on that flank.
Tomb Kings Turn:
The loss of the Colossus was a blow, but the undying legions remained resolute. In the Magic Phase, my High Priest struggled to channel the winds of magic, failing to cast any new offensive spells, though she managed to re-cast Deathly Cabal on the Tomb Guard, maintaining their ward save and terrifying presence.
In the Movement Phase, the Tomb Scorpion remained elusive, failing to emerge from ambush, much to my frustration.
In the Combat Phase, the remaining unit of Skeleton Chariots thundered across the field, slamming into the Minotaur Herd that was still engaged with the Khemrian Warshinx – a powerful combined assault! Most critically, Lord Ramhotep, and his Tomb Guard, their weapons blessed and their forms radiating terror, declared a decisive charge into the stalled Bestigor Herd! Seeing the Ghorgon now free after destroying the Colossus, my Skeleton Warriors immediately turned to face the monstrous beast on their flank, bracing for the inevitable impact.
The Combat Phase saw new clashes erupt! Lord Ramhotep, and his Tomb Guard crashed into the Bestigor Herd. Despite their buffs, the Tomb Guard struggled to inflict decisive blows, hitting only twice and felling 2 Bestigors. In return, the enraged Bestigors struck back with savage fury, killing 3 of my precious Tomb Guard! The combat was lost by 1, and the Tomb Guard were forced to give ground, a rare setback for the elite unit!
On my left flank, the Necropolis Knights continued their rampage, butchering 6 Gors from the unit they had overrun into, suffering no losses in return. The Gors broke and fled, only to be ruthlessly cut down by the pursuing Knights, leaving a swathe of destruction!
The combat between my Chariots and the Tuskgor Chariot on the right flank was a stalemate, with my chariots knocking a couple of wounds off the Beastmen chariot, but neither side gaining a decisive advantage.
The combined charge of my other Chariots and the Khemrian Warshinx into the Minotaur Herd proved devastating. The chariots killed 2 Minotaurs, and the Warshinx crushed another. With their numbers decimated, the last remaining Minotaur fled the field! The victorious Chariots then overran into the Gor Herd directly in front of them, ready for another round of carnage.
Turn 3 - The Grinding Melee:
Beastmen Turn:
The Beastmen, reeling from their losses but still brimming with savage fury, pressed their advantage where they could. In the Charge Phase, the Bestigor Herd, now free of the magical vortex, roared and surged forward, crashing into the Tomb Guard once more – a brutal rematch! The mighty Doombull, recovering from his stupidity, charged the already wounded Khemrian Warshinx, seeking to bring down the ancient construct. The colossal Ghorgon, now unhindered, slammed into my Skeleton Warriors that had braced to meet it, a terrifying impact! In the centre, the Tuskgor Chariot faced with the terrifying presence of the Tomb Guard and their Terror special rule, failed its Terror check and was unable to declare a charge, leaving it stranded. All other Beastmen units continued to push up, eager to join the fray next turn.
In the Magic Phase, the Great Bray-Shaman in Chariot turned his malevolent gaze towards the rampaging Necropolis Knights. He unleashed a volley of dark magic, first a Viletide and then a searing Fireball, the combined arcane assault proving too much for one of the monstrous cavalry, felling a Necropolis Knight!
The Combat Phase exploded with renewed ferocity! The Tomb Guard and Bestigor Herd locked in a brutal, grinding stalemate. Despite the Tomb Guard's buffs, they continued to struggle to inflict decisive hits, even with their re-rolls of 1, resulting in no clear victor in this round of combat. The Chariots on my right flank continued their protracted struggle against Tom's Tuskgor Chariot, their combat also remaining a frustrating stalemate.
A thunderous roar signaled the end for my Khemrian Warshinx! The Doombull, a whirlwind of muscle and axe, utterly destroyed the already wounded construct, leaving a trail of shattered stone and gold.
In a swift and decisive engagement, my other Chariots butchered 6 Gors from the unit they were engaged with! The Gor Herd, utterly broken by the devastating charge, turned and fled, only to be ruthlessly cut down by the pursuing chariots, leaving another gaping hole in Tom's lines.
The Ghorgon's charge into the Skeleton Warriors was devastating, the multi-limbed beast felling 5 of the skeletal infantry! In return the warriors managed to inflict a single wound on the monstrous Ghorgon! However, the sheer numbers and unyielding nature of the Skeleton Warriors, combined with the inspiring presence of the Royal Herald and their own static combat resolution, allowed them to astonishingly win the combat by 1! This single wound proved decisive,The mighty Ghorgon, surprised and momentarily checked, was forced to give ground, recoiling from the unyielding skeletal line, while the Skeleton Warriors held their ground, a truly heroic feat!
Tomb Kings Turn:
The undying legions, though battered, showed their true resilience. In the Movement Phase, my units that were not engaged in combat skillfully redressed their ranks, adjusting their positions to face the remaining Beastmen threats and bring their full strength to bear. The Tomb Scorpion still remained hidden, its moment yet to come.
In the Magic Phase, my High Priest struggled to channel the winds, failing to cast any new offensive spells, though she managed to re-cast Deathly Cabal on the Tomb Guard, maintaining their ward save and terrifying presence.
The Combat Phase saw the culmination of several brutal engagements! Lord Ramhotep, and his Tomb Guard, after a grueling struggle, finally broke the will of the Bestigor Herd! The elite Beastmen, battered and demoralized, turned and fled the field. The Tomb Guard relentlessly pursued their broken foe, overrunning into Tom's central Tuskgor Chariot, setting up a new, decisive engagement!
On my right flank, the protracted stalemate was broken! MySkeleton Chariots finally overwhelmed and shattered the Tuskgor Chariot they were fighting, sending it crashing to the ground.
On my left flank, the Necropolis Knights continued their rampage, having already butchered the Gors.
The combat between my other Skeleton Chariots (who had previously routed the Minotaurs) and the Gor Herd continued, with the chariots having already inflicted heavy casualties.
The Skeleton Warriors continued to hold their ground against the Ghorgon, having forced it to give ground in the previous round.
Game End: A Bloody Stalemate!
As the dust began to settle and the sun dipped below the horizon, the brutal clash between the Tomb Kings and the Beastmen came to an abrupt end. Time had run out on the battlefield, forcing both commanders to call a halt to the fighting.
Upon a final tally of the surviving forces and the value of the units destroyed, the battle was declared a Draw! While the Tomb Kings had inflicted significant casualties and broken several key Beastmen units, they had also suffered grievous losses, including the Necrolith Colossus and the Khemrian Warshinx. The points were close, with the Tomb Kings holding a slight advantage, but not enough to claim a decisive victory.
4. The Aftermath: A Bloody Stalemate!
The battle was a brutal, grinding affair, ending in a hard-fought draw. Both sides had committed their forces with ferocity, and while the Tomb Kings had ultimately broken several key Beastmen units the Beastmen had managed to destroy two of Khemri's mightiest constructs. The desolate farmstead was littered with the broken bones of skeletons and the mangled forms of Beastmen, a testament to the ferocity of the conflict.
5. Commander's Notes & Lessons Learned
From Lord Ramhotep's Perspective:
"The resilience of my Tomb Guard was ultimately proven, even after an initial setback, they broke the Bestigor Herd and continued their relentless advance. The swiftness of my Chariots and Necropolis Knights proved invaluable in clearing the flanks and running down the foe. The Skeleton Warriors' incredible stand against the Ghorgon was a testament to their unyielding nature, even without their Colossus."
"The High Priest's magic, though sometimes difficult to channel, provided crucial buffs. However, the loss of both the Necrolith Colossus and the Khemrian Warshinx to the enemy's monstrous and character attacks was a significant blow, one that prevented a more decisive victory."
"The Tomb Scorpion's failure to emerge from ambush was a missed opportunity; its timely strike could have swung the tide even further in our favour."
Analysis for Future Campaigns:
Strengths Highlighted: The Tomb Kings' ability to absorb punishment and grind down elite infantry (Tomb Guard vs. Bestigors), combined with the devastating impact of their monstrous cavalry (Necropolis Knights) and chariots, is a formidable combination. The sheer resilience of even basic Skeleton Warriors can surprise opponents.
Key Decisions: The initial buffing of the Tomb Guard was a sound strategy, though the dice rolls proved frustrating. Focusing the fast units on breaking flanks quickly proved effective.
Areas for Reflection: The Beastmen's monstrous elements (Ghorgon, Doombull, Minotaurs) proved incredibly dangerous against your constructs. Finding ways to mitigate their impact or focus fire more effectively on them will be crucial in future engagements. The unreliability of the Tomb Scorpion's ambush was a factor.
Memorable Moments:
The Great Bray-Shaman's miscast in Turn 1, a small but amusing early setback for Tom.
The brutal, drawn-out combat between the Tomb Guard and Bestigor Herd, a true test of elite infantry.
The astonishing moment the Skeleton Warriors held their ground and forced the mighty Ghorgon to give way!
The final, decisive charges of your Tomb Guard and Chariots, breaking the last of the Beastmen's core units just as time ran out.
A bloody and hard-fought draw, a testament to the resilience of both Khemri's ancient legions and the savage fury of the Beastmen!


